In one of my recent blog posts, I have explained in a step-by-step tutorial how to deploy an Azure VM, running Certbot on Ubuntu, to request SSL certificates from Let’s Encrypt using HTTP challanges. This very basic setup is good to explain the basic principle of issuing certificates from Let’s Encrypt, but at the same time it is very unhandy and too complicated. You need to do far too many manual steps by moving A records for pointing to your Certbot machine and afterwards move them back to your test or QA workloads.
But there is a better way available for creating Let’s Encrypt certificates using DNS challenges! In this blog post, I will explain you how to use a Hyper-V VM on your local machine and use DNS challenges instead of HTTP, which makes moving A records obsolete. That makes this setup the better choice for QA environments, and it makes a better tool in your toolbox for creating new SSL certificates with SAN names. It also makes you able to create wildcard certificates, which is not possible using HTTP challenges.
Index
- Prerequisites and Goals
- Setup Hyper-V VM and install Ubuntu 22
- Download and Configure Certbot on your VM
- Preparation of Azure DNS zones for Certbot
- Configuration of Certbot Azure DNS Plugin
- Request Certificates via DNS challenge
- Converting the certificates to P12 format
- Conclusion & Future Maintenance
Prerequisites and Goals
To perform this step-by-step tutorial, you need the following:
- Hyper-V services installed on your machine or any Hyper-V available
- DNS zones hosted in an Azure subscription
- Owner role in the Azure subscription hosting the DNS zone
This setup can also work with DNS zones hosted on different providers. The range of supported DNS providers is limited by the available third-party DNS challenge plugins, available for Certbot. You can check if your DNS provider is supported here in the Certbot documentation.
After performing this tutorial, you will have a persistent Certbot VM running on your local machine, which you can use at any time to issue and renew Let’s Encrypt SSL certificates for the Azure DNS zones you own.
Setup Hyper-V VM and install Ubuntu 22
As a first step, you need to download the latest Ubuntu Server image from the official repository and move it to any location on your machine to mount it as installation media for your VM. You can find the latest Ubuntu 22 server images at this link.
Next, you can create a VM, using the Hyper-V Manager on your local machine. If you do not have the Hyper-V services installed yet on your Windows 11 machine, just open an elevated terminal window and run the following PowerShell cmdlet:
Enable-WindowsOptionalFeature -Online -FeatureName Microsoft-Hyper-V-AllA basic Generation 2 VM with 2 vCPU, 4.096 MB of dynamic memory and 60 GB of virtual hard disk space is totally sufficent. My machine is rather running with only about 1 GB of allocated RAM and requires only 10,7 GB of disk space after issuing my first SAN certificate.
After creating the VM, just install Ubuntu 22 with minimal settings and activate OpenSSH during installation. I will create a step-by-step tutorial later and link it here for everybody who never installed a Linux distribution yet.
After installation finished, perform the required restart and sign in to the VM the first time using the Hyper-V console to read it’s assigned IP address by the Hyper-V virtual networking services. Run the following command after signing in:
ip -a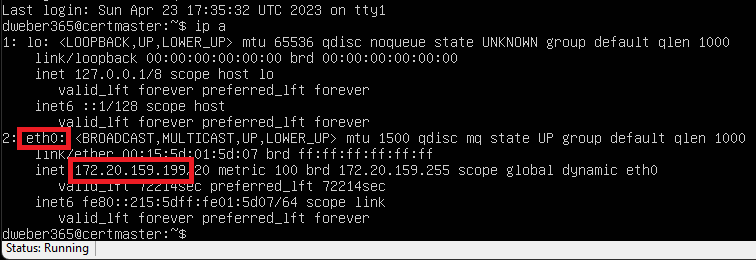
Write down your VM’s IP address and enter the command exit to close the Hyper-V console connection.
Now you are able to use a Windows terminal window to connect to your virtual machine using SSH. Open a regular terminal window and use the Windows 11 built-in SSH capabilities to connect to your virtual machine. Use the following command with your individual IP address to open an SSH connection:
ssh dweber365@172.20.159.199You may need to confirm the self-signed SSL certificate when connecting for the first time, by entering yes in the following step. Enter the password creating on installing Ubuntu 22 and you will find yourself in the already familiar Linux console setting signed in to the VM.
Note: The biggest advantage of using SSH instead of the Hyper-V console is, that you can copy and paste the required commands directly into the terminal window. That spares a lot of time on first issuing a certificate and at least every 3 months when renewing your certificates. The other big benefit is, that OpenSSH also support SCP connections to download your certificates.
Download and Configure Certbot on your VM
Before installing the required Certbot binaries, you should update your system and get rid of all possibly already installed outdated packages. Run the following cmdlet to use apt-get to update all packaged:
sudo apt update
sudo apt upgrade
Enter your password and confirm installation of all updates and connected dependencies. You possibly need to confirm restart several services. Do as proposed by the assistant and complete all upgrades.
Next step, remove possibly pre-installed Certbot packages to perform a clean installation of the latest version available. If you see a “Package ‘certbot’ is not installed, so not removed” message, you are all fine.
sudo apt remove certbotThe developers of Certbot’s preferred package manager snapd should already be installed on an latest Ubuntu distribution. It’s still better to double check and run the following command to install it, if it should not be on your system yet:
sudo apt install snapd
When your system is working all fine, you can then install Certbot:
sudo snap install --classic certbotCreate a symlink to the certbot command, so it can be run on your system with the following command:
sudo ln -s /snap/bin/certbot /usr/bin/certbotBefore you can work with third-party plugins in Certbot, you need to trust plugin authors having root privileges on your system. That a security measure to make sure, system administrators understand they run a third-party script with highest privileges on their system and that’s in general not the best idea for productive or shared workload servers. Run the following command to trust third-party plugins:
sudo snap set certbot trust-plugin-with-root=okNow you can install the DNS plugin of your choice, in my case that’s the certbot-dns-azure plugin used for Azure DNS integrated zones:
sudo snap install certbot-dns-azure
After successful installation from the snapd repos, you should see a confirmation message like this:
certbot-dns-azure 2.1.0 from Terry Cain (terrz) installedAs the last step, you need to load the new plugin into the Certbot configuration:
sudo snap connect certbot:plugin certbot-dns-azureWhen everything went well, you should see dns-azure as one of the plugins listed when running the following command:
certbot plugins --text
The required packages have now been installed on the system. In the next step, the Azure DNS zones will be configured and the Certbot configuration for DNS challenges will be created. Continue with the next chapter.
Preparation of Azure DNS zones for Certbot
The plugin uses the Azure API to access your DNS zone for creating and then removing a record. If the record can be created and verified using a DNS lookup, the challenge was finished successfully, which is the required validation for Let’s Encrypt to sign your certificates.
To provide Certbot API access to the Azure DNS zone, a service principal with access to the Azure resource is required. Service principals can be setup using a secret and certificates. While certificates are clearly more secure, for this setup I am going to use a simple secret for simplicity reasons.
Note: Even if Let’s Encrypt certificates are not meant for being used in Enterprise productive scenarios, but only in test and QA environments, attackers can also enter a company network using these non-productive resources. So, you should always aim for the most secure way of setting up your test and QA systems as well. That’s even more important if you are running a small business and you want to use these Let’s Encrypt certificates for your productive workloads. If you want me to create another tutorial using certificates for the service principal, just leave me a comment and I will update this blog post at a later time.
You now need to go to the Azure portal and sign in with an account that has permissions on your subscription where your Azure DNS zones are located. Your account should have permissions to create a new service principal and change access on the Azure DNS resource. Owner permissions on your subscription should just work fine:
- Navigate to the Azure Portal and sign in with your privileged account, at https://portal.azure.com.
- Select All services from the left side navigation pane and select Azure Active Directory from the top pane.
- Select App registrations from the left side pane and select + New registration from the top pane.
- Below Name, enter “CertbotApiAccess” and select Register.
- On the CertbotApiAccess page, select Certificates & secrets from the left side pane.
- On the Client secrets tab, select + New client secret to generate a new secret.
- On the right-side pane, enter any description and expiration and select Add.
- Copy the string below Value and store it in a secure place.
- Now select All services from the left side navigation pane again and navigate to DNS zones.
- Select your DNS zone from the list to open the new pane.
- Select Access control (IAM) and select + Add and Add role assignment.
- Select DNS Zone Contributor and select Members from the top pane.
- Validate Selected role is set to DNS Zone Contributor and the radio button right from Assign access to is set to User, group, or service principal.
- Select + Select members to open the right side pane.
- Enter CertbotApiAccess below Select and add it to Selected members.
- Select Select to close the pane.
- When the SP is present as a member in the table, select Review + assign two times.
The new Service Principal was added, and access was granted to the Azure DNS zone. With the selected permission level “DNS Zone Contributor“, your SP only has permissions to change records and not the whole Azure DNS zone at all. You can now continue with the configuration of the Certbot plugin on the machine running Certbot.
Configuration of Certbot Azure DNS Plugin
Back on the SSH conenction with your Certbot machine, you now need to create an Azure DNS configuration file. This file stores some details about your Azure subscription and SP to use (including the secret). It also works as a reference or mapping table, to tell Certbot which domains it is allowed to use DNS challenges in your Azure DNS zones to create certificates for.
The name of the file is irrelevant, so you could also have multiple configuration files for different Azure subscriptions, but it needs to follow the pattern shown in the code block below:
dns_azure_sp_client_id = <your_SP_client_id>
dns_azure_sp_client_secret = <your_SP_secret>
dns_azure_tenant_id = <your_tenant_id>
dns_azure_environment = "AzurePublicCloud"dns_azure_zone1 = m365experts.net:/subscriptions/10000000-aaaa-bbbb-cccc-100000000000/resourceGroups/toolbox/providers/Microsoft.Network/dnszones/m365experts.net
dns_azure_zone2 = weberatwork.de:/subscriptions/10000000-aaaa-bbbb-cccc-100000000000/resourceGroups/toolbox/providers/Microsoft.Network/dnszones/weberatwork.deAny DNS zone you want to create SAN or wildcard certificates for, must be mapped in this configuration file. If a mapping is missing, Certbot will refuse the use the according DNS name for creating a DNS challenge.
To create your own configuration, simply use nano in the SSH session to create a new file and copy and paste the code block above as your template:
nano azure-dns-certbot.iniThe file now contains the secret for accessing the service principal. So, to leverage protection, the file should be owned by root and access must be restricted. Run the next command to change ownership and permissions of the file to root:
sudo chown root:root ~/azure-dns-certbot.inisudo chmod 600 ~/azure-dns-certbot.iniYou are now ready to use your configuration for your first DNS challenge certificate request. Before you are ready to use Certbot Non-interactive, you need to register first and accept the ACME Terms of Service. This registration is also useful to get informed via mail if certificates are about to expire:
sudo certbot registerEnter your mail address, accept the ToS and decide if you want to get the EFF newsletter. Your mail address is not tested and registering for the newsletter is not mandatory.
Request Certificates via DNS challenge
Now, all preparation work is done. Let’s request the first SAN certificate for being used on Exchange for the single namespace “mail.m365experts.net” and the two autodiscover domains for “m365experts.net” and “weberatwork.de”. Adapt the following command to your SAM certificate needs and request your first Let’s Encrypt certificate using the DNS challenge:
sudo certbot certonly --authenticator dns-azure --preferred-challenges dns --key-type rsa --cert-name "M365Experts-QA" --noninteractive --agree-tos --dns-azure-config ~/azure-dns-certbot.ini -d mail.m365experts.net,autodiscover.m365experts.net,autodiscover.weberatwork.deThe switch --authenticator dns-azure tells Certbot to use the Azure DNS plugin and --preferred-challenges dns is used to start a DNS challenge. I’m using --key-type rsa to create an RSA certificate useable on Exchange servers and to remember where I am going to use the certificate, I assign it the friendly name --cert-name "M365Experts-QA". The parameter --dns-azure-config must point to your configuration file and the -d parameter specifies all DNS names that should be part of the certificate, separated with a comma. The first entry will also be used as Common Name (CN) and the following names will be used as Subject Alternative Names (SAN).
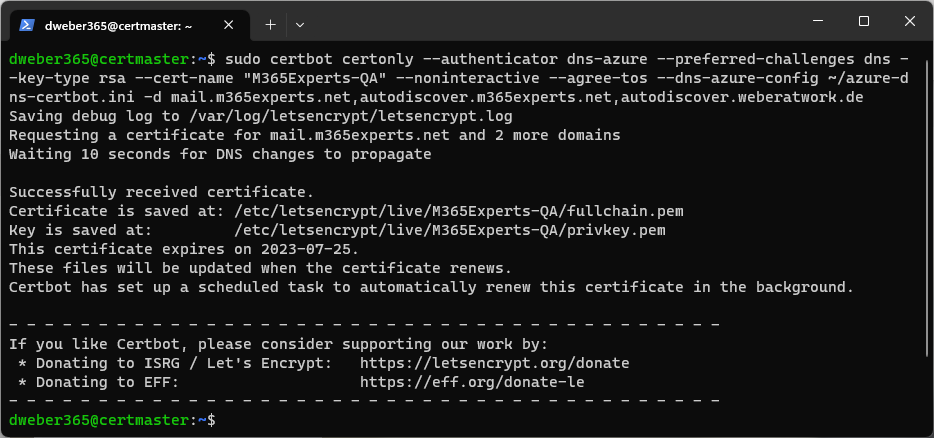
When everything worked as intended, you should see the a status of “Waiting 10 seconds for DNS changes to propagate” which means the records were successfully created in your Azure DNS zones and Certbot will wait 10 seconds till being able to check via DNS lookup, if they are correct. When the lookup is successful and the challenge was successfully done, you will see the message “Successfully received certificate.” and the location in your file system where the certificate, the key file and the full chain are stored.
Before downloading this certificate, give it a try and request a second wildcard certificate for “m365experts.net”. Just make some slight changes for the friendly name and the domains and request the wildcard certificate with a command like this:
sudo certbot certonly --authenticator dns-azure --preferred-challenges dns --key-type rsa --cert-name "M365Experts-Wildcard" --noninteractive --agree-tos --dns-azure-config ~/azure-dns-certbot.ini -d *.m365experts.net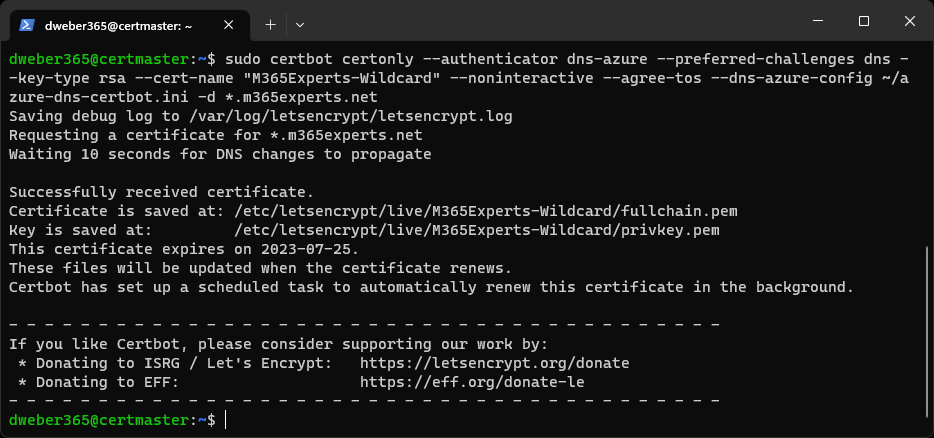
When the request of the SAN certificated already worked, you should see a success message and the different location for the new certificates files as well.
Congratulations to requesting a SAN and a wildcard certificate via Certbot’s Azure DNS plugin from Let’s Encrypt!
Converting the certificates to P12 format
Dependant on your intended use, you could now download the certificates via SCP and use them on any Linux target system. Because Windows Server don’t work very well with PEM certificates, you first need to convert them using OpenSSL. In the next steps the SAN and the Wildcard certificates will be converted to P12, that is readable for Windows OS. In this process, the certificate, the chain and the private key will be merged into a single file, that is password protected for being transported to target system(s).
Adapt the following command to your needs and use OpenSSL to convert your certificate:
sudo openssl pkcs12 -export -in /etc/letsencrypt/live/M365Experts-QA/fullchain.pem -inkey /etc/letsencrypt/live/M365Experts-QA/privkey.pem -certfile /etc/letsencrypt/live/M365Experts-QA/cert.pem -name "Let's Encrypt SAN Lab Certificate 04/2023" -out ~/m365experts-qa.p12Note: The pathes are case sensitive and the files will not be found, if you don’t enter the exact path in higher and lower case as shown when the certificate was successfully requested.
Enter a transport password and confirm your password. The last parameter specifies the location of your new P12 certificate, in this case your signed in user’s home folder.
Now do the same for the wildcard certificate by running the following command:
sudo openssl pkcs12 -export -in /etc/letsencrypt/live/M365Experts-Wildcard/fullchain.pem -inkey /etc/letsencrypt/live/M365Experts-Wildcard/privkey.pem -certfile /etc/letsencrypt/live/M365Experts-Wildcard/cert.pem -name "Let's Encrypt SAN Lab Certificate 04/2023" -out ~/m365experts-wildcard.p12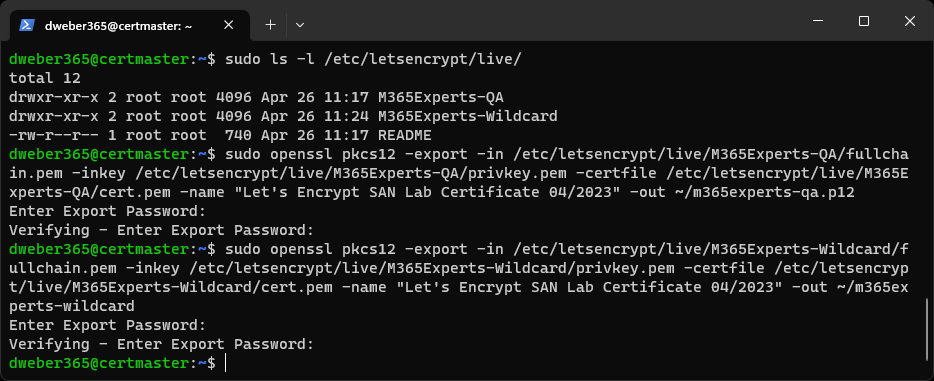
You now have two P12 files in your home folder, with all certificate information required for being used on Windows OS. Because the OpenSSL command was run with root permissions, the file is still owned by root and you need to transfer ownership to your user to download it using SCP. Use this commands to take ownership of the files:
sudo chown dweber365:dweber365 ~/m365experts-qa.p12sudo chown dweber365:dweber365 ~/m365experts-wildcard.p12You are done using SSH for creating your certificate and can leave the session by entering exit in your terminal window.
As the last step, download the certificate to your Windows 11 machine by using SCP from your terminal. The syntax is simple:
scp <username>@<serverip>:/<filesystem> <localpath>In my example, the command looks like the following:
scp dweber365@172.20.159.199:/home/dweber365/m365experts-qa.p12 C:\Tempscp dweber365@172.20.159.199:/home/dweber365/m365experts-wildcard.p12 C:\TempThe certificate has now been downloaded to your “Temp” folder on your “C” drive and it’s ready for being used on Windows Servers for any workloads.
Conclusion & Future Maintenance
Using DNS challenges is much easier as HTTP challenges. You can continue using any certificates for your owned DNS zones now, after you have done the initial setup. Just adapt the certbot and the openssl commands to your future needs.
Now to the maintenance part: Let’s Encrypt certificates have a very short validity time of 3 month, so you need to renew your certificates at least every 89 days to keep your QA environment or your small workload up and running. You may also want to add additional SAN entries to your certificate or change the used algorithm from RSA to ECDSA for testing reasons. I have collected some useful commands for tasks in the next steps.
Show all certificates managed by your Certbot instance
sudo certbot certificates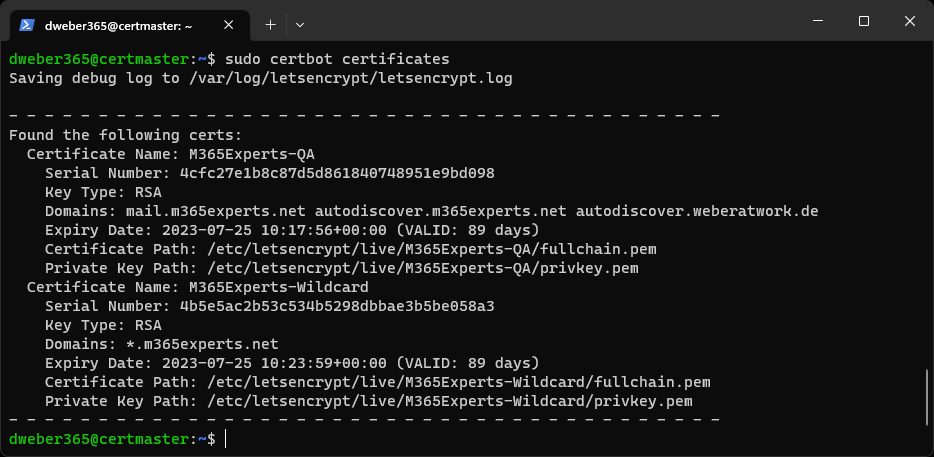
You can see how long the certificates are still valid, which domains are covered and where the files are stored on your system.
Renew existing certificate with same entries
sudo certbot renew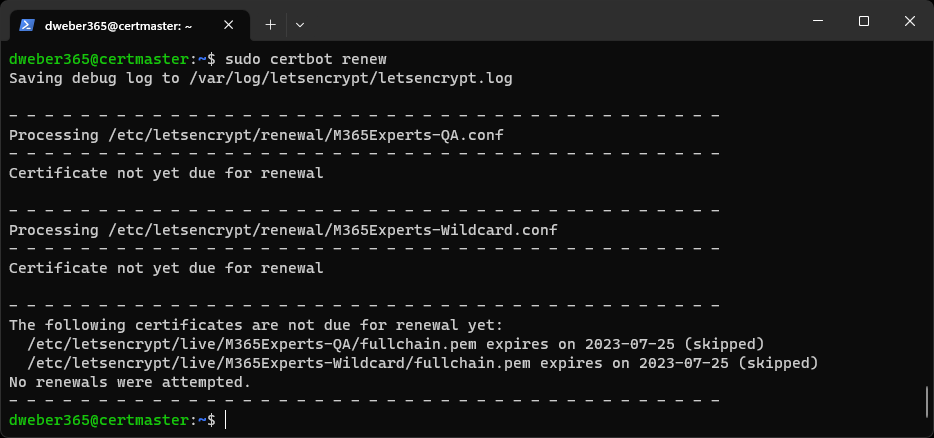
Automatically renew certificates that are about to expire. Afterwards, you can run your OpenSSL command to convert your certificate to P12 and download it via SCP again.
Change the key type of an existing certificate
sudo certbot reconfigure --cert-name "M365Experts-QA" --key-type ecdsa
If your server requires another key type, such as RSA in case of Exchange Server, you can use a different key type by issuing this command. Because ECDSA is the new default for Certbot since version 2.0.0, you will most likely change the key type from ECDSA to RSA instead. 😉
Change RSA key size of an existing certificate
sudo certbot reconfigure --cert-name "M365Experts-QA" --key-type rsa --rsa-key-size 4096Thanks for reading my post! Leave me a comment with some feedback or additional command you are using for your certificate management!